Creating interfaces
Vuba provides a series of OpenCV HighGUI contructors for easily creating image analysis user interfaces. All of these contructors are based around the base constructor class: BaseGUI. This class provides a series of decorators that allow us to code up complex interfaces using simple, declarative code.
Single trackbar interfaces
To demonstrate the ease of use of this module, let’s first code up a simple binary threshold viewer containing a single trackbar. We will first need to grab some footage to work with:
import vuba
import cv2

# Create a handler for reading in the video
video = vuba.Video("../examples/example_data/raw_video/test.avi")

# Read in the first frame for the viewer
first = video.read(index=0)
Now that we have some footage, we can go about creating our user interface. First, we will need to initiate an instance of FrameGUI since we are working with a single frame:
# Initiate an instance of FrameGUI
gui = vuba.FrameGUI(first, "Threshold viewer")
Next we need to integrate our image processing function into the interface. Since we are only doing a binary threshold here this is relatively simple:
@gui.method
def threshold(gui):
    frame = gui.frame.copy()  # create a copy of the current frame
    thresh_val = gui["thresh_val"]  # grab the current threshold value

    # Grayscale the current frame
    gray = vuba.gray(frame)

    # Threshold the current frame
    _, thresh = cv2.threshold(gray, thresh_val, 255, cv2.THRESH_BINARY)

    return thresh
Finally, we need to add a trackbar so that we can visualise the effects of varying our binary threshold:
@gui.trackbar("Threshold", id="thresh_val", min=0, max=255)
def on_thresh(gui, val):
    gui["thresh_val"] = val
    img = gui.process()
    cv2.imshow(gui.title, img)
We’re almost done, now all we need to do is run the gui we created:
gui.run()
The output of this code should give you the following gui:
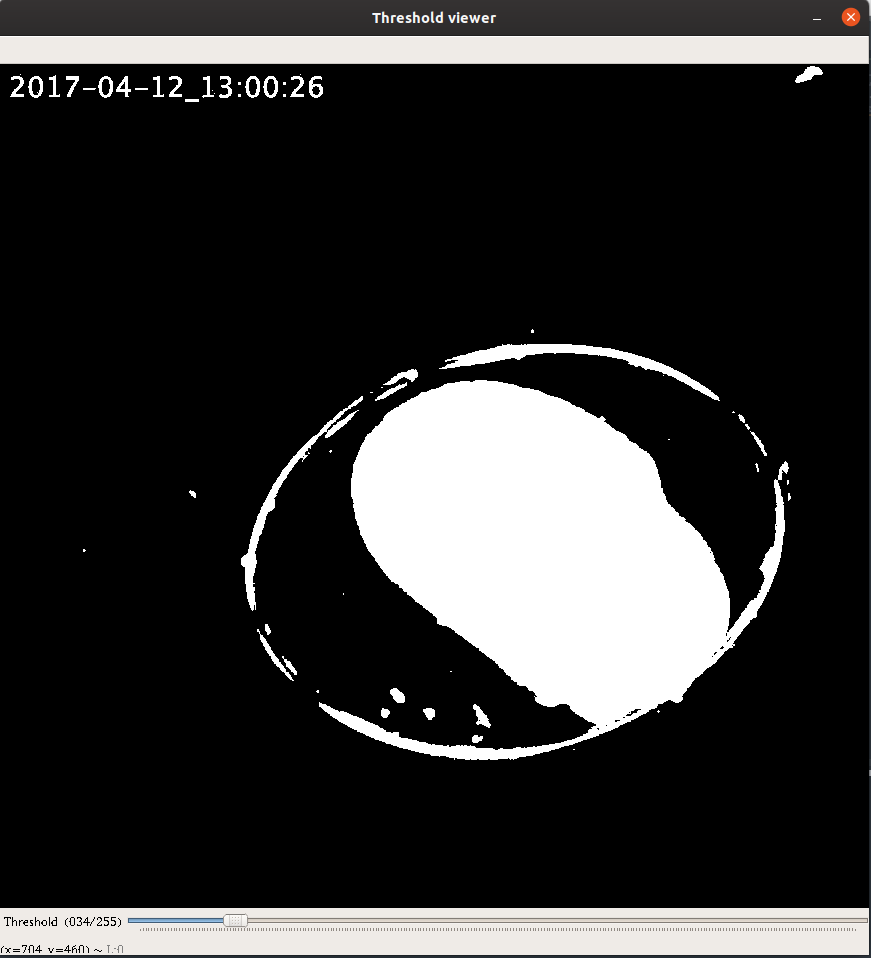
This might seem trivial, but in less than 20 lines of code (excluding comments and whitespace) we have created a user interface that enables us to view the output of a variable binary threhsold. Note that because all gui constructors use the same base class, we only have to address the video constructor and supply an object that describes a video instead, to apply the interface to a movie:
# Initiate an instance of VideoGUI
gui = vuba.VideoGUI(video, "Threshold viewer")

@gui.method
def threshold(gui):
    frame = gui.frame.copy()  # create a copy of the current frame
    thresh_val = gui["thresh_val"]  # grab the current threshold value

    # Grayscale the current frame
    gray = vuba.gray(frame)

    # Threshold the current frame
    _, thresh = cv2.threshold(gray, thresh_val, 255, cv2.THRESH_BINARY)
    return thresh

@gui.trackbar("Threshold", id="thresh_val", min=0, max=255)
def on_thresh(gui, val):
    gui["thresh_val"] = val
    img = gui.process()
    cv2.imshow(gui.title, img)

# And finally execute the gui
gui.run()
Multi-trackbar interfaces
To add additional trackbars to an interface, we only need to specify another trackbar using BaseGUI.trackbar and add additional steps to our image processing method:
# Initiate an instance of VideoGUI
gui = vuba.VideoGUI(video, "Threshold viewer")

@gui.method
def threshold(gui):
    frame = gui.frame.copy()  # create a copy of the current frame
    tb_vals = gui.values() # grab all current trackbar values

    # Grayscale the current frame
    gray = vuba.gray(frame)

    # Threshold the current frame
    _, thresh = cv2.threshold(gray, tb_vals['thresh_val'], 255, cv2.THRESH_BINARY)

    # Blur the thresholded image (note to exclude even values for actual applications)
    blur = cv2.GaussianBlur(thresh, (tb_vals['blur_val'],tb_vals['blur_val']), 0, 0)

    return blur

# Add trackbars using the default callback
gui.trackbar("Threshold", id="thresh_val", min=0, max=255)(None)
gui.trackbar("Blur", id="blur_val", min=1, max=101)(None)


# And finally execute the gui
gui.run()
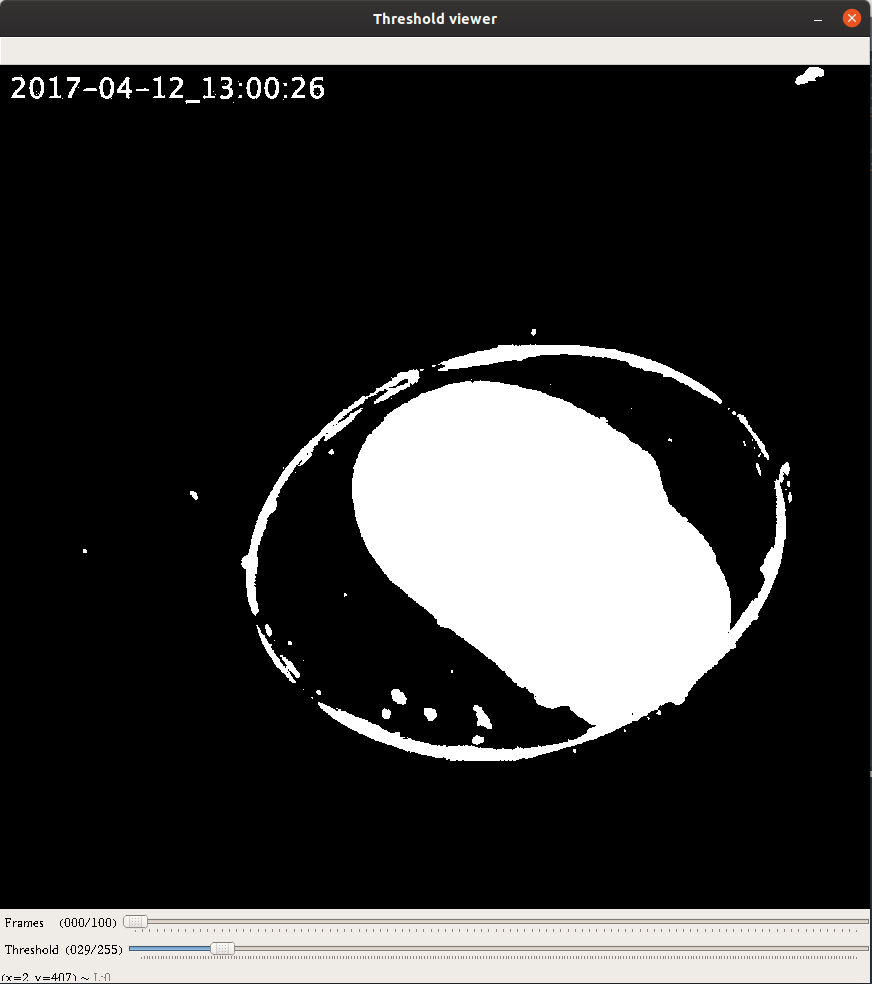
This should give us the following interface:

See also
For additional example scripts that cover usage of this module in more depth, see the following: